
An immersive photo experience is a built object with a job: to produce a photograph a guest chooses to post. That is a much narrower brief than “make something beautiful,” and it changes nearly every decision downstream — where the structure stands, how wide the opening is, what it is made of, how light lands on a face, and how quickly a line of people can move through it. Designed as decor, it photographs as decor. Designed as architecture with a camera in mind, it becomes the reason people came.
The gap between an activation guests walk past and one they queue for is almost never the idea. It is framing, light, flow, and finish — four things that get decided in drawings long before anyone stands in front of the thing. This is how our design and production teams think about each of them.
What a Photo Experience Has to Do That a Backdrop Does Not
A backdrop is a surface you stand in front of. An immersive photo experience is a place you stand inside, or beside, or through — something with depth, edges, and a point of view. Depth is what separates a photograph that reads as a person at an event from one that reads as a person in a world.
The object has three jobs at once. It has to carry the brand legibly at thumbnail scale, because that is how the image will first be seen. It has to flatter a human being standing at arm’s length from a phone. And it has to survive hundreds of hands, shoulders, and bags without looking handled by the second hour.
The “One Love” Pride installation at One World Observatory is a clear example of all three landing together. Commissioned by the marketing team for the One World Trade Center complex, it was designed and fabricated as a twelve-foot-wide by eight-foot-high photo activation: a laser-cut acrylic sculpture of layered translucent buildings, a rainbow color progression running through them, a stylized New York skyline, and One World Trade Center itself featured in the composition. It gave a visitor a place to stand inside a picture of the city, and it held that role throughout Pride Month.
Design the Opening Before You Design the Object
Framing is the whole exercise. Every photo experience contains a void — the space a person occupies — and that void should be drawn first. Everything else is structure built around it.
Drawing the opening first forces the questions that matter. How many people stand in it: one, a pair, a group of five with their arms around each other? Where is the eye line of an average adult, and where is the top rail relative to it? Is there headroom for someone tall, and a sensible floor position so the group does not drift out of the composition? An opening that is generous in elevation drawings is often tight once bodies, bags, and drinks are in it.
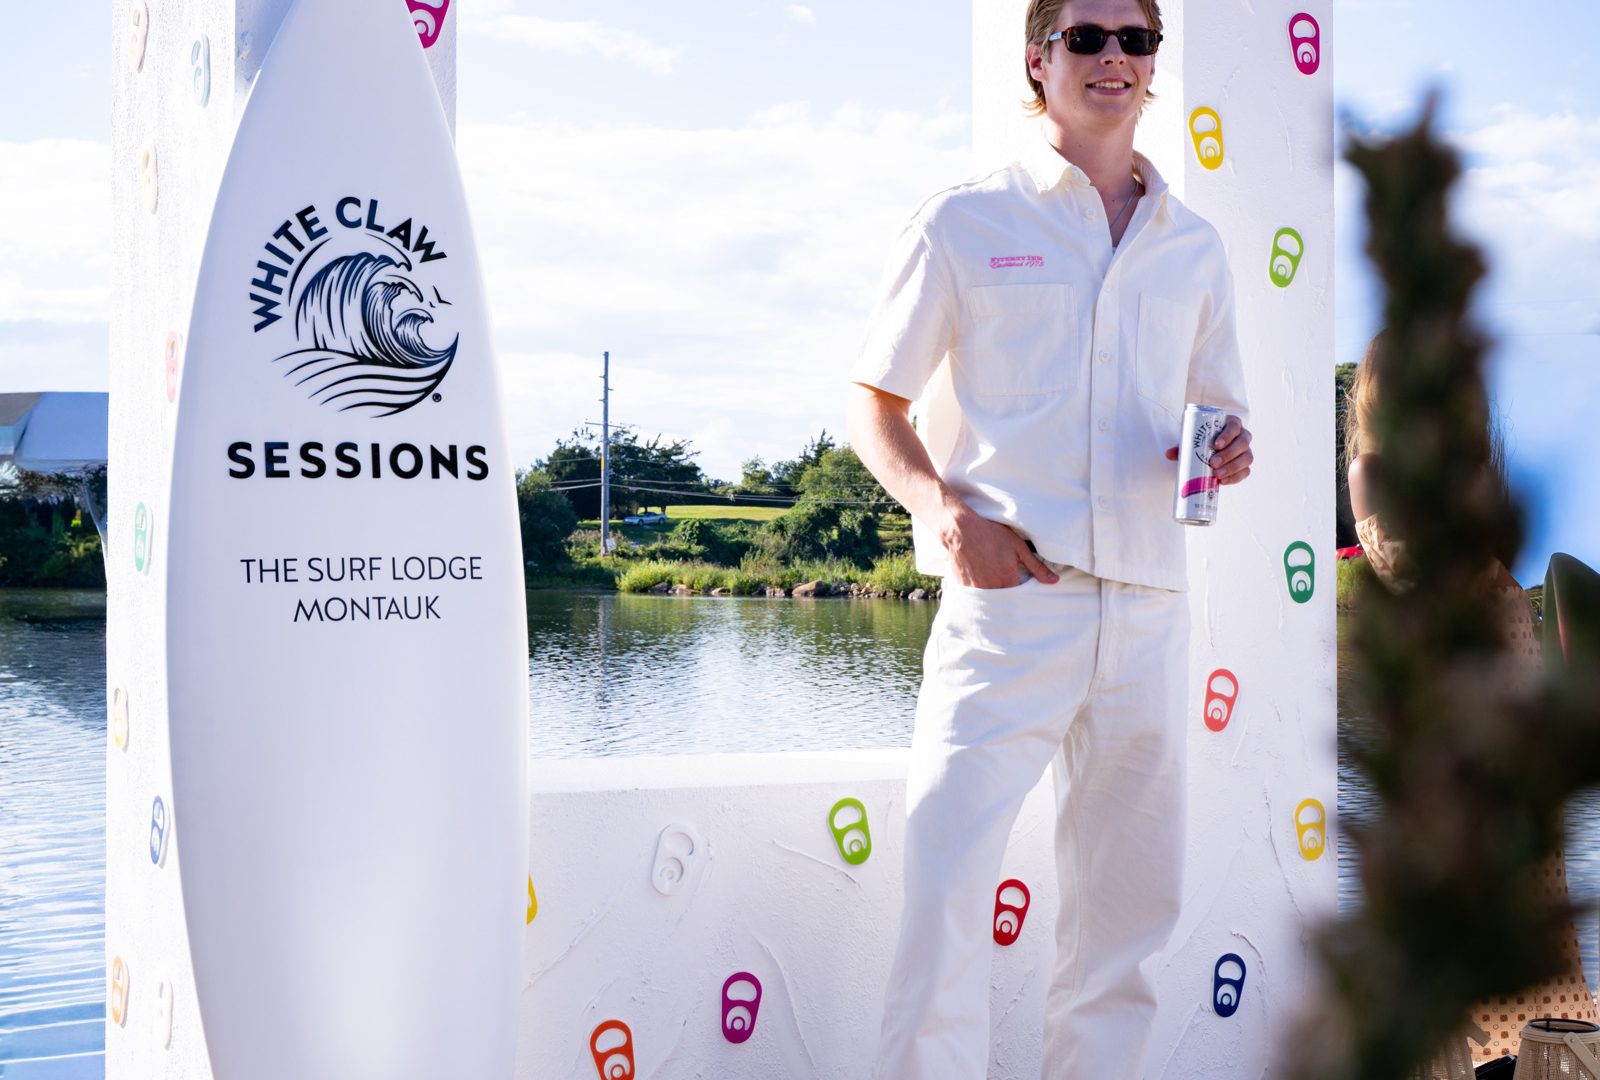
The oversized white photo frame we fabricated and installed for White Claw Sessions at The Surf Lodge in Montauk works because the opening does the composing. Scattered with the brand’s colored can tabs and set on the waterfront deck, the frame supplies the brand and the geometry; Fort Pond behind it supplies the picture. That is the cleanest version of the idea: the build contributes the part the location cannot, and gets out of the way of the part it already has.
The same logic argues against filling every square inch with graphics. If the structure is louder than the person in it, the guest is a prop in the brand’s photo rather than the subject of their own. Brand marks want to sit at the edges of the frame, at a size that survives cropping, not across the center where a face belongs.
Light It for the Phone, Not for the Room
A phone camera is the actual audience for this build, and it behaves nothing like an eye. Its sensor is small, its auto-exposure chases the brightest region in the frame, and it will happily render a face in silhouette in order to protect a bright sky or a hot LED edge. Rooms that feel beautifully moody in person produce muddy, noisy photographs.
The fix is almost always fill. Light on the guest, from the front, at a color temperature that matches whatever is lighting the structure, so skin does not go green against a warm build or blue against a cool one. Where the build itself is illuminated — edge-lit acrylic, an internally lit logo, a luminous line — that brightness has to be dimmable relative to the fill, or the camera will expose for the light source and lose the person entirely.
Outdoor and daylight installs are a scheduling problem as much as a lighting one. Orientation decides whether guests squint into the sun during peak hours or get an hour of usable backlight, and whether a hard shadow from a nearby structure cuts a face in half at four in the afternoon. That question belongs in the site survey, not in a conversation on install day.
Finish thresholds follow from the same thinking. At Magic Hour Mountain Lodge at the Moxy in midtown, the faux log cabin walls were shop-built and finished to read as timber from phone-camera distance — an après-ski environment eighteen floors up, installed without modifying the rooftop, with a set of photo moments woven into it. Knowing the distance the camera will be at tells the scenic shop exactly how far to take a finish, and where additional labor stops showing up in the picture.
Throughput Is a Design Problem
An immersive photo experience that works too well will jam, and a jammed activation stops generating images. Flow deserves the same drawing attention as the object.
Sequence the four moments deliberately: approach, wait, pose, exit. Separate the entry and the exit so people leaving do not push through people arriving. Give the queue a defined edge, ideally against a wall or a run of soft goods rather than through a traffic lane. Decide where the photographer or attendant stands, because that position sets the composition for every image of the night and is the single cheapest quality control you have.
Dwell time is longer than most plans assume. Guests take several frames, check them, hand the phone to someone else, and go again. Designing for groups rather than individuals raises the number of people served per minute more than any other single change. So does giving guests something to do with their hands. The custom White Claw Sessions surfboards placed at the entrance and around the property functioned as props and wayfinding at once, which is the efficient version of both.
Where volume is the point, build more than one position into the same structure — two openings, a bench, a place to lean — so several photographs happen in parallel rather than in series. Our guest flow planning and content capture strategy tend to be drawn on the same sheet for exactly this reason.
Materials That Survive Being Touched
Everything in a photo activation is at hand height, which makes material behavior a design constraint rather than a finish note.
Acrylic is the workhorse for layered, light-carrying builds. Laser-cut edges glow, translucent sheets stack into real depth, and color can be graduated through the stack instead of printed onto it. It also shows fingerprints instantly, holds static and the dust that comes with it, and scratches from a careless wipe. Specify it where the layering earns its keep, plan the cleaning cadence into the run of show, and keep the polished faces above the height where people brace themselves.
Mirror does two things no other surface does: it doubles the apparent size of a space and it captures whatever is overhead, which outdoors means sky. The mirror-finish WHITE CLAW letters standing on the sand at the edge of Fort Pond take their color from the day. On a larger scale, the mirror cladding system we fabricated and installed across the street-facing façade of the Delilah pop-up in Montauk shows the same principle applied as architecture rather than as an object. At guest height, mirror-finish panel systems are the sane choice over glass.
Carved and coated foam gives you sculptural mass at a weight a rigging plan can accept — the hand-carved foam Earth suspended at the heart of our private dinner at One World Trade Center anchored a centerpiece photo experience precisely because it could be large without being heavy. Whatever the material, the details that decide durability are the unglamorous ones: radiused corners at knee height, ballast that disappears into the base, no cable crossing a walking path, and touch-up finish left with the crew.
The Background You Do Not Own
Most immersive photo experiences are installed inside someone else’s architecture, and the smart ones treat that architecture as an asset rather than an obstacle. A waterfront, a skyline, a landmark interior, a rooftop view — these are backgrounds no fabrication shop can build, and the design question is how to compose them in rather than cover them up.
That posture also solves the venue’s concerns. Free-standing structures, ballasted bases, and panels that attach to a fabricated substrate instead of to the building keep the install reversible. The two-story walk-through Barbie Dream House built inside Cipriani was engineered as a modular, self-supporting steel and wood structure, pre-fabricated in our New York shop and test-assembled before delivery, with scenic panels and interior vignettes attached as drop-in components that never touched the venue’s original surfaces. At that scale the photo experience is the building.
From Drawings to Install
The production path for a photo activation is the same one any custom event fabrication project follows, and each step protects the image at the end of it. Shop drawings resolve the opening dimensions and the joint lines a camera will find. Engineering review settles weight, ballast, and rigging before anyone specifies a finish. A test fit in the shop proves the piece assembles in the order the crew will actually assemble it on site, at an hour when a correction costs nothing.
Then the piece is broken down, crated with its hardware, labeled by assembly sequence, and installed inside the venue’s load-in window. Strike is planned with the same care, because the last impression a venue keeps is the state of the room after the trucks leave.
Whether the brief is a sculptural frame, an immersive photo experience for an entertainment brand like the one we produced for Emily in Paris, or a full experiential event design program with photography as one moment inside it, the sequence does not change. Draw the picture you want first. Build the object that makes that picture inevitable.
If you have a moment you want guests to photograph and share, we can tell you early whether the idea survives contact with a venue, a crowd, and a phone camera — and what it takes to build. Start a conversation with our team and bring whatever you have, including a sketch on the back of a run of show.