
A photo moment is a piece of architecture before it is an image. Photo moment fabrication is the craft of building an object that stays square, clean, and well lit while a crowd leans on it, reaches into it, and photographs it from angles the renders never showed. The design decides what the thing looks like. The build decides whether it still looks like that at the end of the night.
That distinction matters because the photo moment is usually the single most-reproduced object at an event. Every other element — the bar, the lighting, the seating plan — is experienced once, in the room. The built photo moment is experienced again on a few thousand screens, at phone resolution, in vertical crop, under whatever light the guest happened to be standing in. Our shop treats it as a structural and finish problem first, and a graphic problem last.
What a Photo Moment Has to Do
A photo moment has four jobs, and they pull against each other. It has to read instantly as the brand’s. It has to hold a human body at a flattering distance and height. It has to light a face without blowing out its own surfaces. And it has to move people through at the rate the room produces them.
Most disappointing builds fail on the last two, not the first. A gorgeous object that puts guests in shadow produces photos nobody posts. A gorgeous object with one entrance and one exit produces a line that swallows the activation footprint and strands the rest of the floor plan. Both failures are decided in event fabrication, weeks before anyone stands in front of it.
The useful question at concept stage is not “what should it look like” but “what is the photograph.” Framed waist-up portrait of two people? Full-body group of six? A wide environmental shot where the object is the backdrop and the skyline is the subject? Each answer sets a different width, a different height, a different standoff distance, and a different lighting approach. Settle it before shop drawings, because it determines the whole build.
Structure Comes First
Every photo moment resolves into one of three structural strategies, and the choice is driven by the venue more than by the design.
Freestanding and self-supporting. The object carries its own load to the floor and touches nothing else. This is the default in landmark and hospitality venues, where attaching to a wall is simply not available. The two-story Barbie Dream House we built inside Cipriani is the extreme version of the approach: a modular, self-supporting steel and wood structure, pre-fabricated in our NYC shop and test-assembled before it was delivered, with scenic panels and interior vignettes attaching as drop-in components that never touched the venue’s original surfaces. The same logic scales down to a single frame — engineer it to stand alone and the venue conversation gets much shorter.
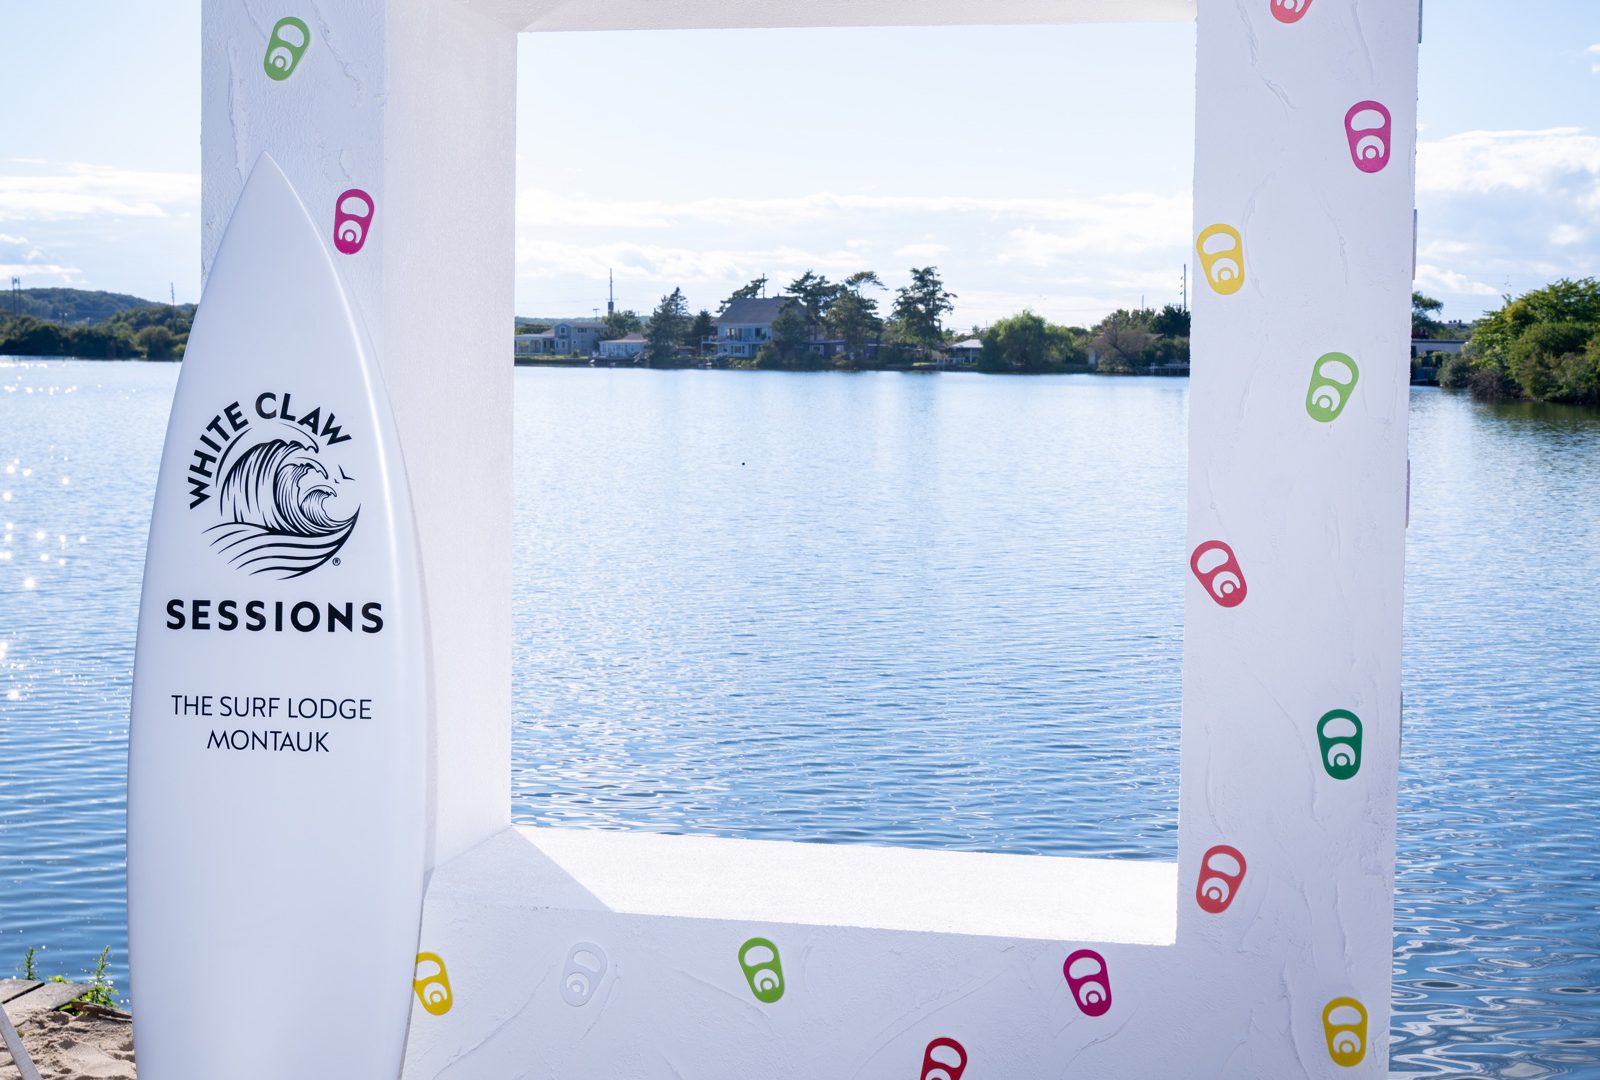
Ballasted. Outdoors, or on sand, or anywhere the floor cannot be penetrated, the object stays upright because of weight and footprint geometry rather than anchorage. For the White Claw Sessions takeover of The Surf Lodge in Montauk, we fabricated, produced, and installed mirror-finish WHITE CLAW letters that stand on the sand at the edge of Fort Pond, along with an oversized white photo frame on the waterfront deck. Pieces like those are built around their bases: the visible object is the part the guest sees, and a disproportionate share of the shop time goes into what keeps it standing in wind.
Suspended. When the floor is precious or the composition wants the object overhead, the load goes up into the rigging. At a private dinner at One World Trade Center, the centerpiece photo experience was anchored by a hand-carved foam Earth suspended at the heart of the room. Suspension buys a clean floor and a dramatic sightline, and it costs you a rigging plan, a weight schedule, and an engineering review that has to satisfy the venue before anything is fabricated.
Pick the strategy early. Converting a freestanding design to a suspended one after the drawings are approved is not a revision; it is a new build.
Materials and How They Behave Under a Phone Camera
A phone camera is a small sensor with aggressive processing, and it is unforgiving in specific, predictable ways. Material selection in photo moment fabrication is really a prediction about what that sensor will do with a surface.
Mirror and polished metal capture sky, water, and crowd, which is exactly why they photograph so well outdoors and so badly in a low, dim room where all they return is the ceiling. Mirror also shows every fingerprint and every seam, so panel layout and joint placement become aesthetic decisions, not just engineering ones.
Laser-cut acrylic does something no printed graphic can: it holds color in depth. The “One Love” installation we designed and fabricated for One World Observatory during Pride Month is a layered acrylic sculpture — translucent buildings stacked in a rainbow progression behind a stylized New York skyline, with One World Trade Center itself featured in the composition. Layered translucent material gives a camera parallax and edge glow, which is what separates a sculpture from a backdrop in a photograph.
Faux finishes live or die at a distance threshold. The question is never “does it look real” but “does it look real from where the guest is standing, under this light, through this lens.” For the seasonal transformation of Magic Hour, the rooftop bar at the Moxy, our shop built faux log cabin walls finished to read as timber from phone-camera distance — and installed them without modifying the rooftop. That threshold is a specification. Write it down, then paint to it and check it on site with an actual phone rather than with your eyes at arm’s length.
Lighting for the Device, Not for the Room
The most common fixable failure in a built photo moment is that the object is lit and the guest is not. Venue lighting is almost always overhead, which means a guest standing in front of a beautiful wall gets raccoon shadows and a bright surface behind them. The camera then exposes for the bright surface and underexposes the face.
The fix is soft frontal fill at roughly face height, placed so it reaches the guest and not just the build. We plan that fill as part of the fabrication, not as a lighting afterthought: a slot in the structure, a cove, a concealed channel, a baffle to keep the source out of frame. If the object is reflective, the fill has to be angled to avoid firing straight back into the lens as a hotspot.
Color temperature should be consistent across everything inside the frame. Mixed sources are the reason skin tones go green on one side and amber on the other, and no amount of post-processing on a guest’s phone will fix it. Pick a temperature, specify it for every fixture in the photo moment, and resist the venue’s offer to “just add a wash.”
Internally lit and edge-lit builds solve the problem elegantly, because the object becomes its own practical source. The trade-off is heat, power routing, and dimming — all of which have to be in the drawings before the panels are cut.
Throughput Is a Fabrication Problem
A photo moment produces photographs at a rate, and that rate is set by geometry you can build. Dwell time per group is a function of how obvious the posing position is, how quickly people can get in and out, and whether anyone has to be asked what to do.
Three decisions do most of the work. Make the standing position unmistakable, through a change in floor, a gap in the structure, or a built threshold that reads as “here.” Separate the approach from the exit so that the group leaving does not walk through the group arriving. And size the opening for the group you actually expect, because a frame built for two will be used by five, and five people crammed into a two-person frame is a bad photograph and a slow line.
Outdoors this is easier, because people can orbit the object; a letter set on open sand or a frame on a deck has no queue at all, just a loose rotation. Indoors, where guest flow is constrained by walls and furniture, the queue is real and belongs on the ground plan next to the bar and the entrance. Treat the line as part of the build and it stops being a surprise on show day.
It is also worth deciding whether the object is a single destination or a set of distributed moments. Across a property — entrance, deck, lounge, a corridor between them — several smaller built pieces will out-produce one hero object, because they spread the crowd and give photographers variety. The Montauk takeover works that way: letters, a frame, branded surfboards at the entrance and around the property, a reclaimed-wood entrance sign, each a touchpoint rather than a single stop.
Durability and the Long Install
Guests touch photo moments. They lean, they sit on edges that were not meant to be sat on, they put drinks down on finished surfaces, and children arrive at the exact height of the most fragile detail. A build that is only as strong as its appearance will be visibly tired by mid-event.
So the shop hardens the first foot. Edges get radiused or protected, corners get reinforced, lower panels get a tougher finish than upper ones, and anything within reach gets specified as cleanable. Mirror and gloss acrylic need a wipe-down schedule and a stocked touch-up kit on site, because fingerprints are not damage but they read as damage in a photograph.
Installations that run for weeks change the calculus again. A month-long public installation faces continuous daytime light, cleaning crews, and far more hands than a one-night event, which pushes material choices toward solid color through the thickness, mechanical fastening over adhesive, and components that can be swapped without taking the piece apart. Our Pride Month work at the Observatory engaged visitors for the whole month, and that duration was a fabrication input from the first drawing.
Plan the strike at the same time. Photo moments are the most photographed and often the most awkward pieces to remove — large, finished on every visible face, and easy to scratch on the way out. Crating, labeling, and a sequence that protects finishes are what decide whether the build can be reused.
How to Brief a Photo Moment Build
A good brief for a photo moment answers five questions in plain language: what the photograph is, how many people are in it, where it sits in the room, how long it has to live, and what the venue will not allow. Everything else — material, structure, light, finish — our team can propose once those are fixed.
Bring the venue’s constraints early rather than late. Floor loading, rigging availability, protection requirements, access dimensions, and the power you can actually get to the object will reshape a design more than any aesthetic note. Bring a photographer’s point of view too, or at least a phone and the intended backdrop at the intended hour, because sun angle and ambient color are design inputs for anything outdoors or near glass.
Finally, name the reuse intent up front. A piece built for one night and a piece built to travel are different objects even when they look identical, and the difference is decided at the joinery. Our brand activations practice and our content capture thinking both start from the same place: what will the image be, and what does the object have to do to produce it reliably.
Photo moment fabrication rewards the projects where the build conversation starts during concept rather than after approval, whether the brief is a laser-cut sculpture, a mirror-finish letter set on sand, a suspended centerpiece, or an immersive photo experience for an entertainment brand. If you have an activation coming up and you are still deciding what the hero object should be, talk to our team while the sketch is loose. We would rather help you size the frame than rebuild it.